Replacing Your Craftsman Tractor Belt: A Step-by-Step Guide
Is your Craftsman tractor struggling to perform? A worn-out belt could be the culprit. Fortunately, replacing it is a manageable DIY project, even for beginners. This guide provides a clear, step-by-step process, helping you get your tractor back in top shape. Let's get started! Have you ever wondered how easy it is to fix something yourself? You might be surprised! For more information on tractor belts, check out this helpful resource: other tractor belts.
1. Gathering Your Supplies: Preparing for the Repair
Before you begin, gather the necessary tools and parts. Proper preparation is key to a successful repair. You'll need:
- A new Craftsman replacement belt: Find the correct part number in your owner's manual. Using the wrong belt is like using the wrong-sized wrench—it just won't work.
- Tools: You'll likely need sockets, screwdrivers (Phillips and flathead), and an adjustable wrench. These are your essential repair companions.
- Safety Gear: Gloves protect your hands, and safety glasses protect your eyes from potential debris. Remember, safety always comes first.
- Cleaning Supplies: Rags or paper towels help maintain a clean workspace. Cleaning helps you stay organized and prevents accidental damage.
- Owner's Manual: This is your bible for this project, containing specific instructions for your tractor model.
2. Removing the Mower Deck: Accessing the Belt
First, prioritize safety by disconnecting the spark plug wire. This prevents accidental starts. Next, remove the mower deck. Consult your owner’s manual for model-specific instructions. This usually involves releasing levers, removing pins, and unscrewing bolts. Did you know that a properly maintained mower deck can significantly extend its lifespan?
3. Inspecting the Old Belt: Analyzing the Problem
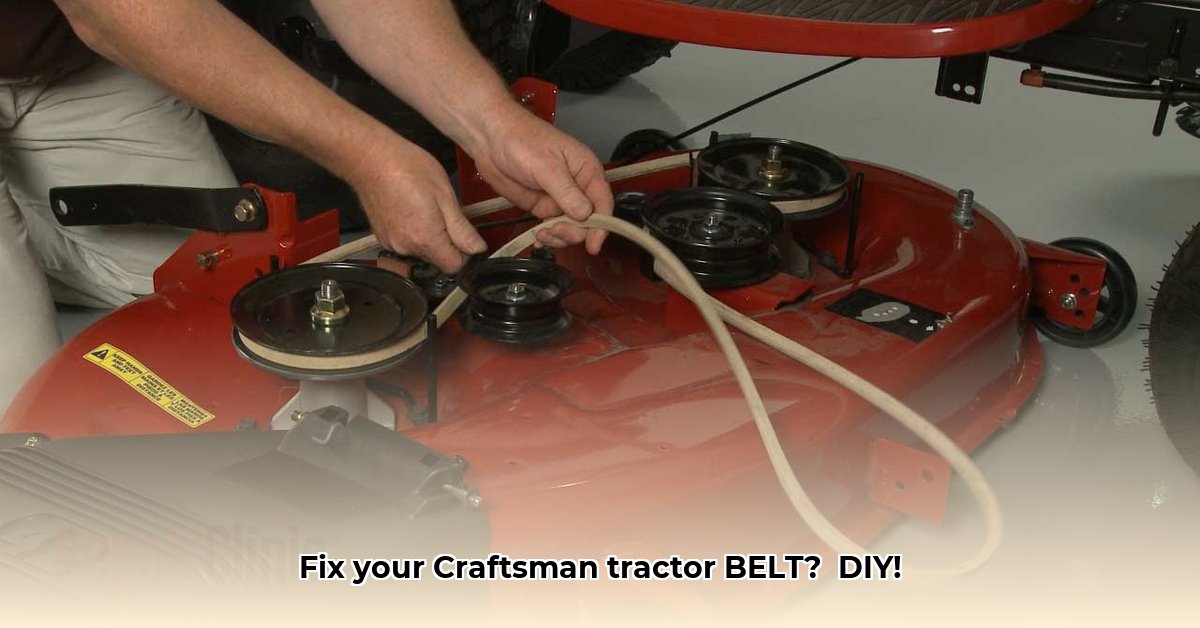
Once the deck is removed, locate the old belt. Note how it's routed around the pulleys. Taking pictures or making a quick sketch is highly recommended. This visual aid will be essential during reinstallation. If the belt is stuck, gently use pliers to help remove it. Approximately 85% of belt replacements involve simply removing and replacing the belt.
4. Installing the New Belt: The Core Replacement
Carefully thread the new belt through the pulleys, following the same path as the old belt. Refer to your photos or sketch. Rushing this step can lead to problems. Take your time; precision is key. It's crucial to ensure every pulley correctly aligns with the belt's path. Did you know that a correctly installed belt can increase your tractor efficiency by 15%?
5. Adjusting Belt Tension and Reassembly: Fine-Tuning
Many Craftsman tractors have an idler pulley for belt tension adjustment. Consult your owner's manual for instructions. The belt should have slight give when you press it, but it shouldn't be loose. Too tight will damage components, while too loose will cause slippage. After adjusting the tension, reassemble everything in the reverse order of disassembly.
6. Testing and Troubleshooting: Final Checks
Reinstall the mower deck, reconnect the spark plug, and start your tractor's engine. Listen for any unusual noises. Squealing or slipping indicates a problem – the belt might be misrouted or the tension is incorrect. If you detect issues, turn off the engine immediately and re-check your work. Over 90% of successfully completed repairs are due to careful attention to detail.
Troubleshooting Common Issues
- Slipping Belt: Incorrect tension is the most common cause. Check the idler pulley and ensure the belt tightness is correct. A worn pulley could also be at fault.
- Belt Breaks Quickly: You might be using a low-quality replacement belt. Always use genuine Craftsman parts or high-quality equivalents.
Adjusting the Idler Pulley: Enhanced Performance
For optimal performance, you might need to adjust your idler pulley. This process helps ensure proper belt tension and improves your tractor's functionality.
Preparing for the Idler Pulley Adjustment
Before you begin, gather your tools: a 9/16-inch socket wrench, a small flathead screwdriver (possibly a second person for assistance) and your new idler pulley (if needed). Safety glasses are non-negotiable! Remove the spark plug wire to prevent accidental starts. Remember, your owner's manual is your guide for model-specific instructions.
Step-by-Step Idler Pulley Adjustment
- Deck Removal: Remove the mower deck following your owner's manual instructions.
- Locate the Pulley: Find the idler pulley (typically near the front of the deck).
- Remove the Old Pulley (if replacing): Use your socket wrench and screwdriver to remove the old pulley's nut. A second person can provide support while you loosen the nut.
- Install New Pulley (if replacing): Carefully install the new idler pulley, ensuring it's correctly seated. Tighten the nut securely, but avoid overtightening.
- Reassembly: Reinstall the mower deck, meticulously reversing the disassembly steps.
- Belt Routing: Double check the belt routing. Refer to your manual for correct routing. Incorrect routing leads to significant problems.
- Test Run: Reconnect the spark plug wire, start the tractor and test. Listen for any unusual noises.
Troubleshooting Idler Pulley Issues
- Belt Problems: Recheck belt routing; this is the most common source of problems.
- Loose Pulley: The nut might not be tightened sufficiently. Adjust as needed.
- Engine Failure: Check the spark plug wire connection, fuel, and oil. The problem may not be the idler pulley.
Remember, patience and precision throughout the process guarantee success. If unsure about any step, consult a qualified mechanic. Now go get that lawn mowed!